Aménager ses combles pas à pas est un projet qui apporte de la fraicheur chez soi. Votre maison possède des combles inutilisés ? Sachez que cet espace perdu, source non négligeable de déperditions thermiques quand il est mal isolé, peut se transformer en un véritable atout.
En effet, il est possible d’y aménager une pièce supplémentaire (chambre d’amis, chambre pour les enfants, suite parentale, salle de jeux, salle de bains, bureau, salon, terrasse…) après quelques travaux. De plus, ces quelques mètres carrés sous la toiture constituent une plus-value importante à moindre coût.
Par ailleurs, comme la modification d’un comble s’accompagne toujours de travaux d’isolation, vous réaliserez des économies d’énergie notables. Vous souhaitez optimiser chaque espace de votre comble et donner lui donner une certaine impression de volume ? Découvrez toutes les solutions et les informations clés pour un aménagement de comble réussi !
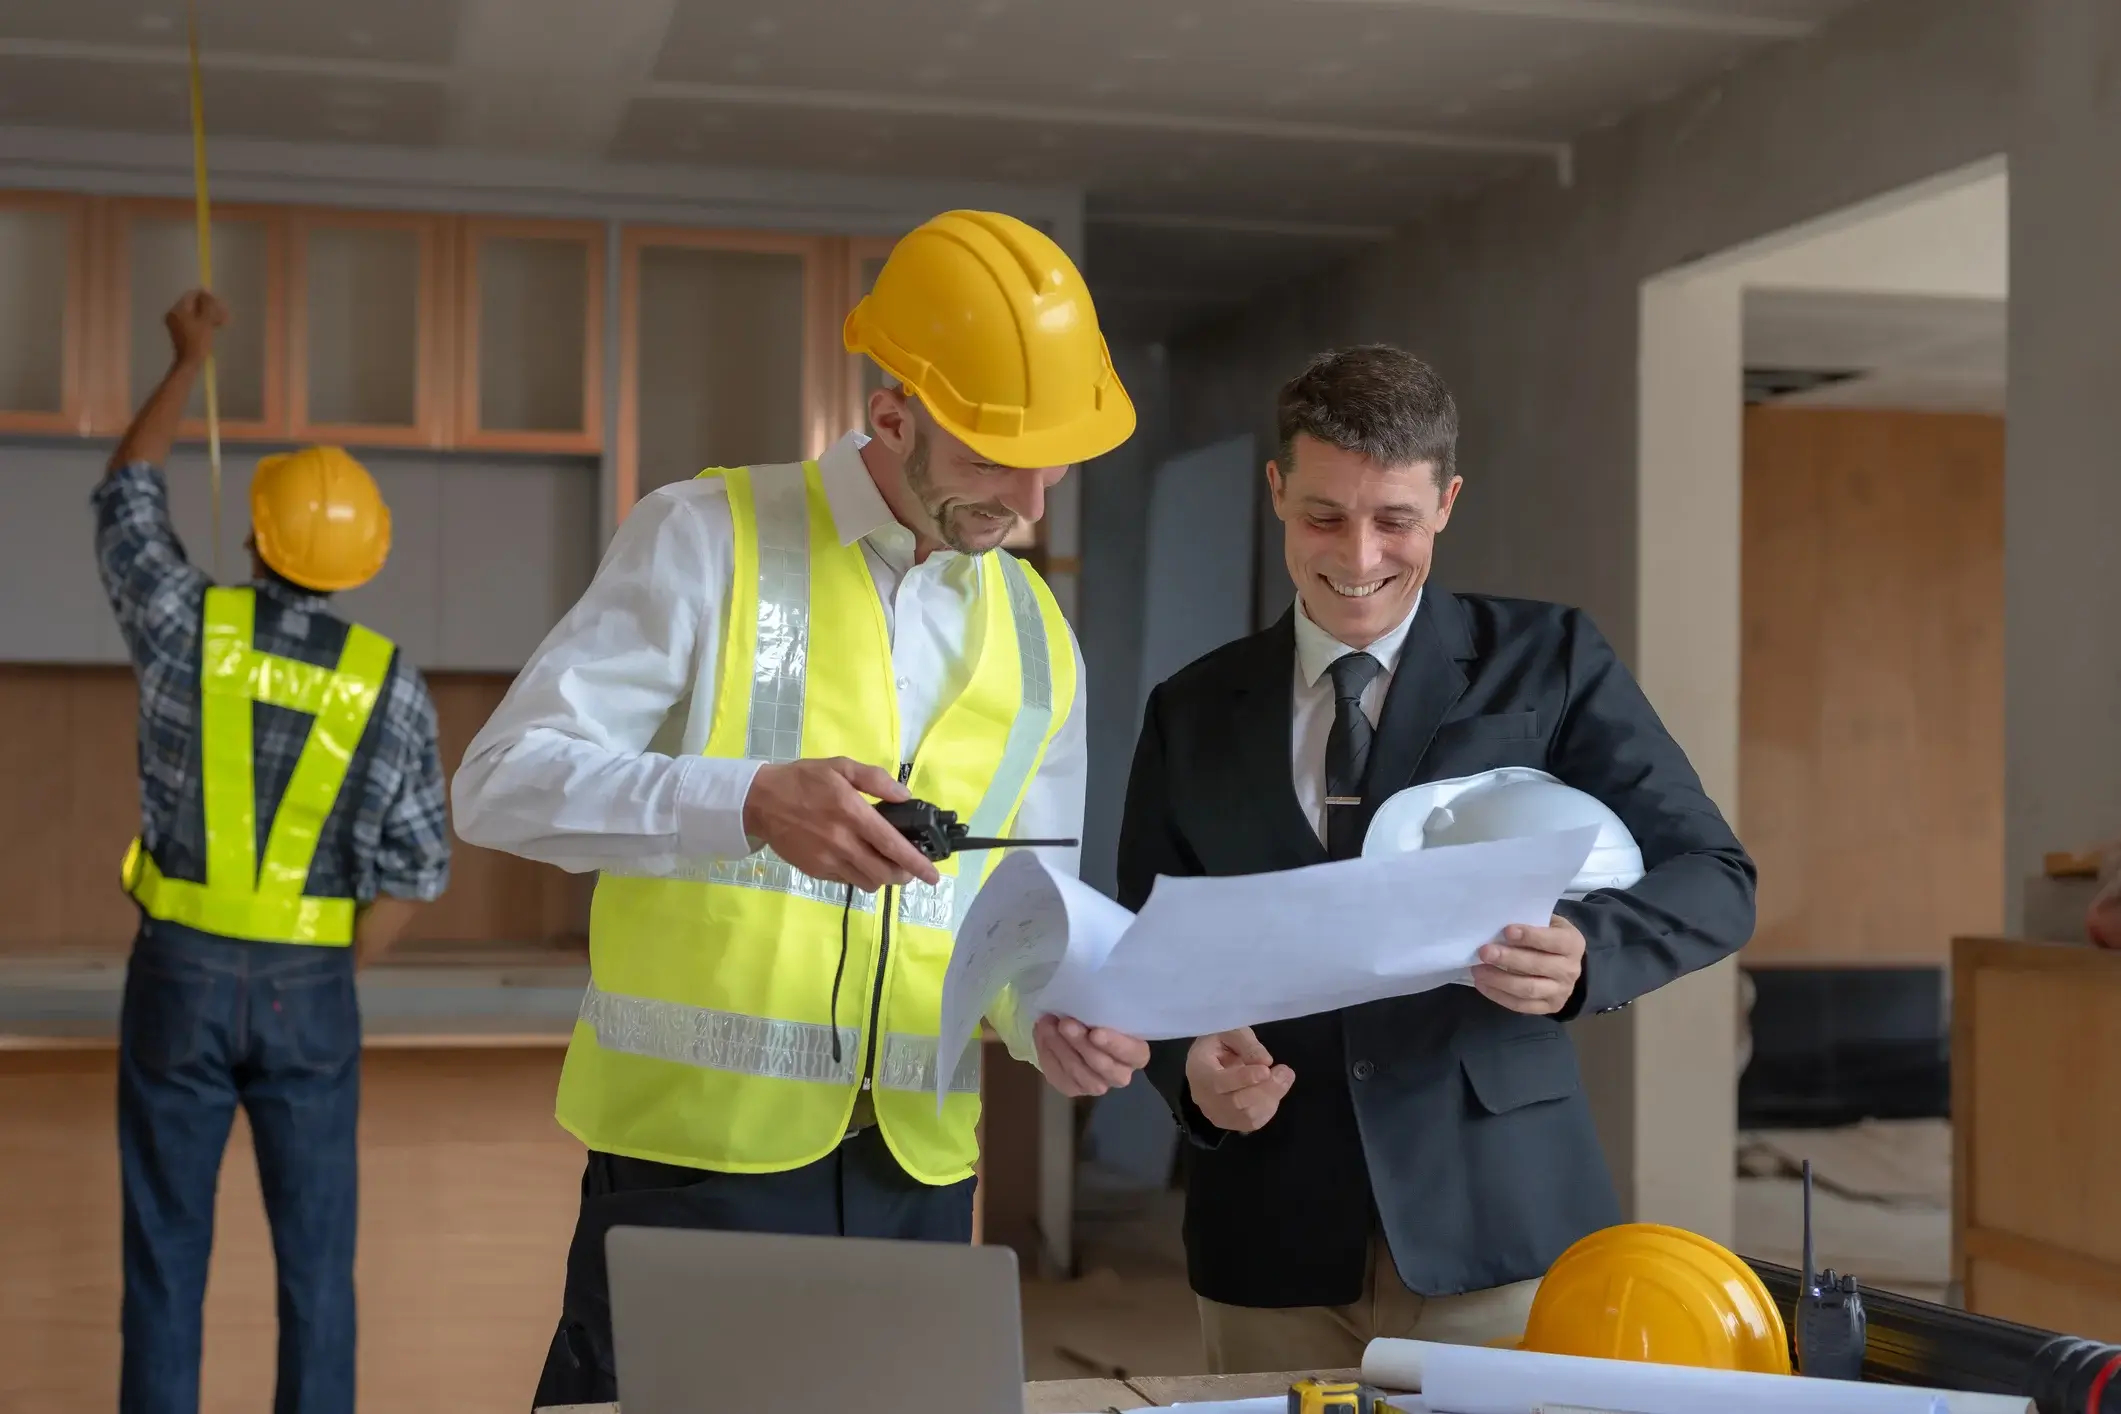
Reno, cabinet d’architecture d’intérieur à Paris, vous accompagne dans cette démarche. Notre expertise en rénovation d’appartement vous garantit un résultat optimal.
Pourquoi aménager vos combles ?
Zoom sur les avantages et potentiel d’espace habitable !
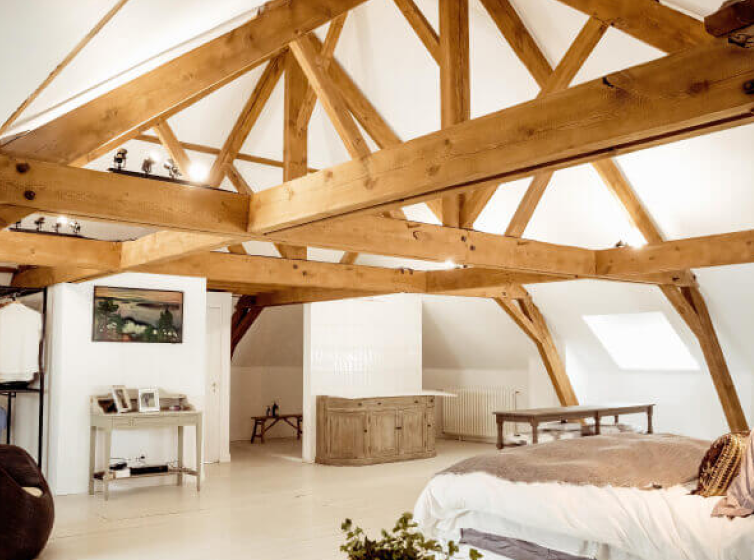
Gain de surface habitable sans extension de la maison
L’aménagement de combles transforme un espace inutilisé en pièce fonctionnelle. Vous gagnez ainsi une surface habitable précieuse sans agrandissement extérieur. Cette solution évite les contraintes administratives liées aux extensions traditionnelles. Les combles aménageables représentent souvent 30% de la surface totale de votre maison.
Votre grenier devient un espace de vie supplémentaire très rapidement. Le potentiel inexploité se transforme en atout majeur pour votre logement. De plus, cette transformation valorise considérablement votre bien immobilier. Les familles recherchent constamment des solutions pour optimiser leur intérieur.
Reno propose des solutions de rénovation adaptées à chaque configuration de combles. Notre expertise permet d’exploiter chaque centimètre carré disponible sous les toits. Nous créons des espaces chaleureux malgré les contraintes structurelles existantes.
Valorisation immobilière et optimisation de l’espace existant
Les combles aménagés augmentent significativement la valeur de votre propriété. L’ajout d’une pièce supplémentaire attire davantage d’acheteurs potentiels. Votre investissement se révèle rentable lors d’une éventuelle revente. Les experts estiment cette plus-value entre 15% et 20%.
L’optimisation de l’espace existant répond aux besoins modernes des familles. Un bureau sous les toits offre un cadre idéal pour le télétravail. Une chambre d’amis comble parfaitement les besoins ponctuels d’hébergement. Chaque mètre carré trouve ainsi une utilité concrète.
La hauteur de plafond constitue un critère essentiel pour réussir votre projet. Notre cabinet d’architecture d’intérieur maîtrise parfaitement ces contraintes techniques. Nous concevons des aménagements qui respectent les normes tout en maximisant l’espace.
Économies d’énergie grâce à une meilleure isolation thermique
L’isolation des combles réduit considérablement vos factures énergétiques. Une toiture mal isolée provoque jusqu’à 30% des pertes de chaleur. Les travaux d’aménagement incluent nécessairement une isolation performante. Votre maison devient plus économe en énergie.
L’isolation thermique et phonique apporte un confort optimal toute l’année. La chaleur reste à l’intérieur durant les mois d’hiver. La fraîcheur se maintient pendant les périodes estivales. Ces avantages se ressentent immédiatement sur votre qualité de vie quotidienne.
Un spécialiste comme Reno vous aide à choisir les matériaux isolants adaptés. Notre expertise garantit des performances énergétiques optimales pour votre projet. Le confort thermique de votre espace sous combles devient comparable aux autres pièces.
Évaluer la faisabilité de votre projet d’aménagement de combles
Voici comment vous allez pouvoir bien évaluer la faisabilité de votre projet.
Vérifier si vos combles sont aménageables selon la hauteur de plafond
La hauteur de plafond détermine la faisabilité de votre projet. La réglementation exige au minimum 1,80 mètre sous plafond. Cette mesure s’applique sur au moins 50% de la surface totale. Les combles à aménager doivent respecter ces critères essentiels.
La pente de toit influence directement l’espace disponible. Une inclinaison idéale se situe entre 35° et 45°. Cette configuration offre un volume confortable pour l’aménagement. Des solutions existent également pour les pentes plus faibles.
Votre charpente traditionnelle ou industrielle définit les possibilités d’aménagement. Certaines structures nécessitent des modifications importantes. D’autres permettent une exploitation directe de l’espace. Un devis pour la rénovation de votre toiture précisera ces aspects techniques.
Les contraintes techniques à considérer avant les travaux d’aménagement
L’accès aux combles constitue un point crucial de votre projet. L’escalier doit respecter des normes précises de sécurité. Son emplacement influence l’organisation générale de votre maison. Plusieurs types d’escaliers s’adaptent aux différentes configurations.
Le plancher existant supporte rarement le poids d’une pièce habitée. Un renforcement devient donc indispensable dans la plupart des cas. Cette étape garantit la sécurité des occupants. Elle assure également la pérennité de l’ensemble de la structure.
Les fenêtres de toit apportent la lumière naturelle indispensable. Leur positionnement dépend de l’orientation de votre maison. Leur dimension influence la quantité de lumière disponible. Reno propose des services complets incluant l’étude d’éclairage optimal.
Comprendre les réglementations et le plan local d’urbanisme
Le plan local d’urbanisme encadre strictement les modifications extérieures. Les règles varient considérablement selon votre commune. Ces contraintes concernent principalement les fenêtres de toit visibles. Certains quartiers imposent des restrictions esthétiques particulières.
Votre projet d’aménagement de combles nécessite généralement une autorisation administrative. La déclaration préalable suffit pour les travaux sans modification de façade. Un permis devient obligatoire pour des transformations plus importantes. Ces démarches protègent l’harmonie architecturale locale.
Les normes de construction imposent des règles strictes d’isolation. La réglementation thermique actuelle fixe des performances minimales. Ces exigences garantissent le confort et l’efficacité énergétique. Notre expertise vous guide à travers ces obligations techniques.
La déclaration préalable de travaux pour l’aménagement des combles
La déclaration préalable de travaux concerne la majorité des projets d’aménagement. Ce document administratif précise la nature exacte des modifications envisagées. Le délai d’instruction standard dure généralement un mois. La mairie peut émettre des prescriptions spécifiques.
Le dossier comprend plusieurs formulaires officiels et plans détaillés. Les documents graphiques illustrent clairement votre projet. Ils montrent l’aspect avant et après les travaux. Un devis de rénovation détaillé complète utilement votre demande.
La surface créée détermine le type d’autorisation nécessaire. Au-delà de 40 m², un permis de construire devient obligatoire. Entre 20 et 40 m², cela dépend de la surface totale résultante. Ces subtilités réglementaires justifient l’accompagnement par des professionnels.
Les démarches administratives indispensables pour aménager les combles
La déclaration préalable suffit pour la plupart des projets standards. Cette procédure s’applique aux travaux modifiant l’aspect extérieur. L’installation de fenêtres de toit entre dans cette catégorie. La surface créée reste inférieure à 40 m².
Le formulaire Cerfa n°13703 constitue la base de votre dossier. Les plans et photographies complètent votre demande administrative. La mairie examine votre projet sous l’angle urbanistique. Le délai de réponse prend généralement un mois.
Votre dossier mérite une attention particulière pour éviter les refus. Les professionnels comme Reno maîtrisent parfaitement ces procédures administratives. Notre expérience garantit un traitement optimal de votre projet d’aménagement dans les combles.
Les cas nécessitant un permis de construire
Le permis de construire devient obligatoire dans plusieurs situations spécifiques. La création d’une surface supérieure à 40 m² impose cette démarche. La modification du volume extérieur nécessite également cette autorisation. Ces transformations importantes justifient un contrôle renforcé.
Le dossier de permis contient des documents techniques précis. Les plans d’architecte détaillent chaque aspect de votre projet. Le délai d’instruction s’étend généralement à deux mois. Certaines zones protégées imposent des contraintes supplémentaires.
L’intervention d’un architecte devient obligatoire au-delà de 150 m². Cette obligation garantit la qualité technique et esthétique du projet. Les prix d’un architecte varient selon l’ampleur des travaux envisagés.
Comment se conformer au plan local d’urbanisme de votre commune ?
Le plan local d’urbanisme définit les règles applicables à votre projet. Chaque commune adopte ses propres contraintes architecturales. Les zones historiques imposent des restrictions esthétiques strictes. Un rendez-vous préalable en mairie clarifie utilement ces aspects.
Les règles concernent principalement l’aspect extérieur de votre toiture. La taille et le nombre de fenêtres font l’objet d’un examen attentif. Certaines communes imposent des matériaux spécifiques. Ces contraintes préservent l’harmonie visuelle du quartier.
La consultation du document d’urbanisme révèle les contraintes applicables. Les professionnels de Reno vous accompagnent dans cette analyse réglementaire. Notre expertise permet d’anticiper les exigences pour un prix de rénovation optimal.
Le budget à prévoir pour votre projet d’aménagement de combles
Le prix de l’aménagement de combles varie selon plusieurs critères importants. La surface habitable représente le facteur principal de variation des coûts. Un petit espace coûte moins cher qu’une grande surface à aménager.
Estimation du prix de l’aménagement de combles selon la surface
Les travaux d’aménagement comprennent plusieurs postes de dépenses incontournables. L’isolation thermique et phonique constitue un investissement majeur. La création de fenêtres de toit influence également le budget final.
En moyenne, le coût oscille entre 1000 et 2000 euros par mètre carré. Cette fourchette dépend de la complexité du projet d’aménagement. Les finitions choisies peuvent aussi faire varier le prix de rénovation au m² de manière significative.
Le budget pour aménager les combles doit intégrer des marges de sécurité. Les imprévus surviennent fréquemment dans ce type de travaux. Une provision de 10% du budget total semble raisonnable.
Les aides financières disponibles (prêt à taux zéro, etc.)
Plusieurs dispositifs peuvent alléger le coût de votre projet. Le prêt à taux zéro offre une solution avantageuse pour certains foyers. Les conditions d’attribution dépendent de votre situation personnelle.
Les aides de l’ANAH soutiennent les propriétaires aux revenus modestes. Ces subventions concernent particulièrement l’isolation des combles. Les économies d’énergie motivent ces programmes d’assistance financière.
Des crédits d’impôt existent pour les travaux d’amélioration énergétique. L’isolation thermique bénéficie souvent de ces avantages fiscaux. Les matériaux utilisés doivent respecter certaines normes pour y prétendre.
La TVA réduite s’applique aux travaux de rénovation. Ce taux préférentiel diminue considérablement la facture finale. Votre logement doit avoir plus de deux ans pour en bénéficier.
Faire appel à un cabinet d’architecture comme Reno pour optimiser votre budget
Un cabinet d’architecture comme Reno optimise efficacement votre budget. Notre expertise permet d’éviter les erreurs coûteuses. Nous identifions les priorités pour une allocation judicieuse des ressources.
Le prix d’un architecte représente un investissement rapidement rentabilisé. Notre connaissance des matériaux évite les surcoûts inutiles. Nos partenariats avec des artisans garantissent des tarifs maîtrisés.
Un plan d’aménagement de combles bien conçu limite les mauvaises surprises. Chaque aspect du projet fait l’objet d’une étude détaillée. Les contraintes techniques sont anticipées dès la conception.
La coordination des différents corps de métier optimise les délais. Cette gestion rigoureuse évite les périodes d’inactivité sur le chantier. Le respect du calendrier contribue à la maîtrise du budget global.
Les étapes d’aménagement de combles pas à pas
Phase 1 : Isolation thermique et phonique des combles
L’isolation des combles constitue la première étape essentielle. Cette phase détermine le confort futur de votre espace. Un isolant performant garantit une pièce agréable en toute saison.
Isoler les combles réduit considérablement vos factures énergétiques. La chaleur reste à l’intérieur pendant l’hiver. La fraîcheur se maintient plus facilement durant l’été.
L’isolation phonique mérite une attention particulière. Les bruits de pluie peuvent devenir dérangeants sous les toits. Des matériaux adaptés atténuent efficacement ces nuisances sonores.
Choix des matériaux isolants adaptés
Plusieurs types d’isolants conviennent aux combles aménagés. La laine de verre offre un excellent rapport qualité-prix. La laine de roche présente des propriétés ignifuges intéressantes.
Les isolants naturels gagnent en popularité ces dernières années. Le liège possède d’excellentes qualités thermiques et acoustiques. La ouate de cellulose s’adapte parfaitement aux espaces difficiles d’accès.
Les panneaux rigides conviennent aux surfaces régulières. Ils simplifient la pose des revêtements muraux. Leur mise en œuvre nécessite toutefois une certaine précision.
Techniques d’isolation performantes
L’isolation par l’intérieur représente la méthode la plus courante. Cette technique préserve l’aspect extérieur de la toiture. Elle réduit néanmoins légèrement la surface habitable.
L’isolation par l’extérieur offre des performances supérieures. Cette solution évite les ponts thermiques problématiques. Elle nécessite cependant une réfection complète de la couverture.
La technique du sarking combine plusieurs avantages importants. Elle maintient la charpente apparente à l’intérieur. Cette méthode garantit une isolation continue et très efficace.
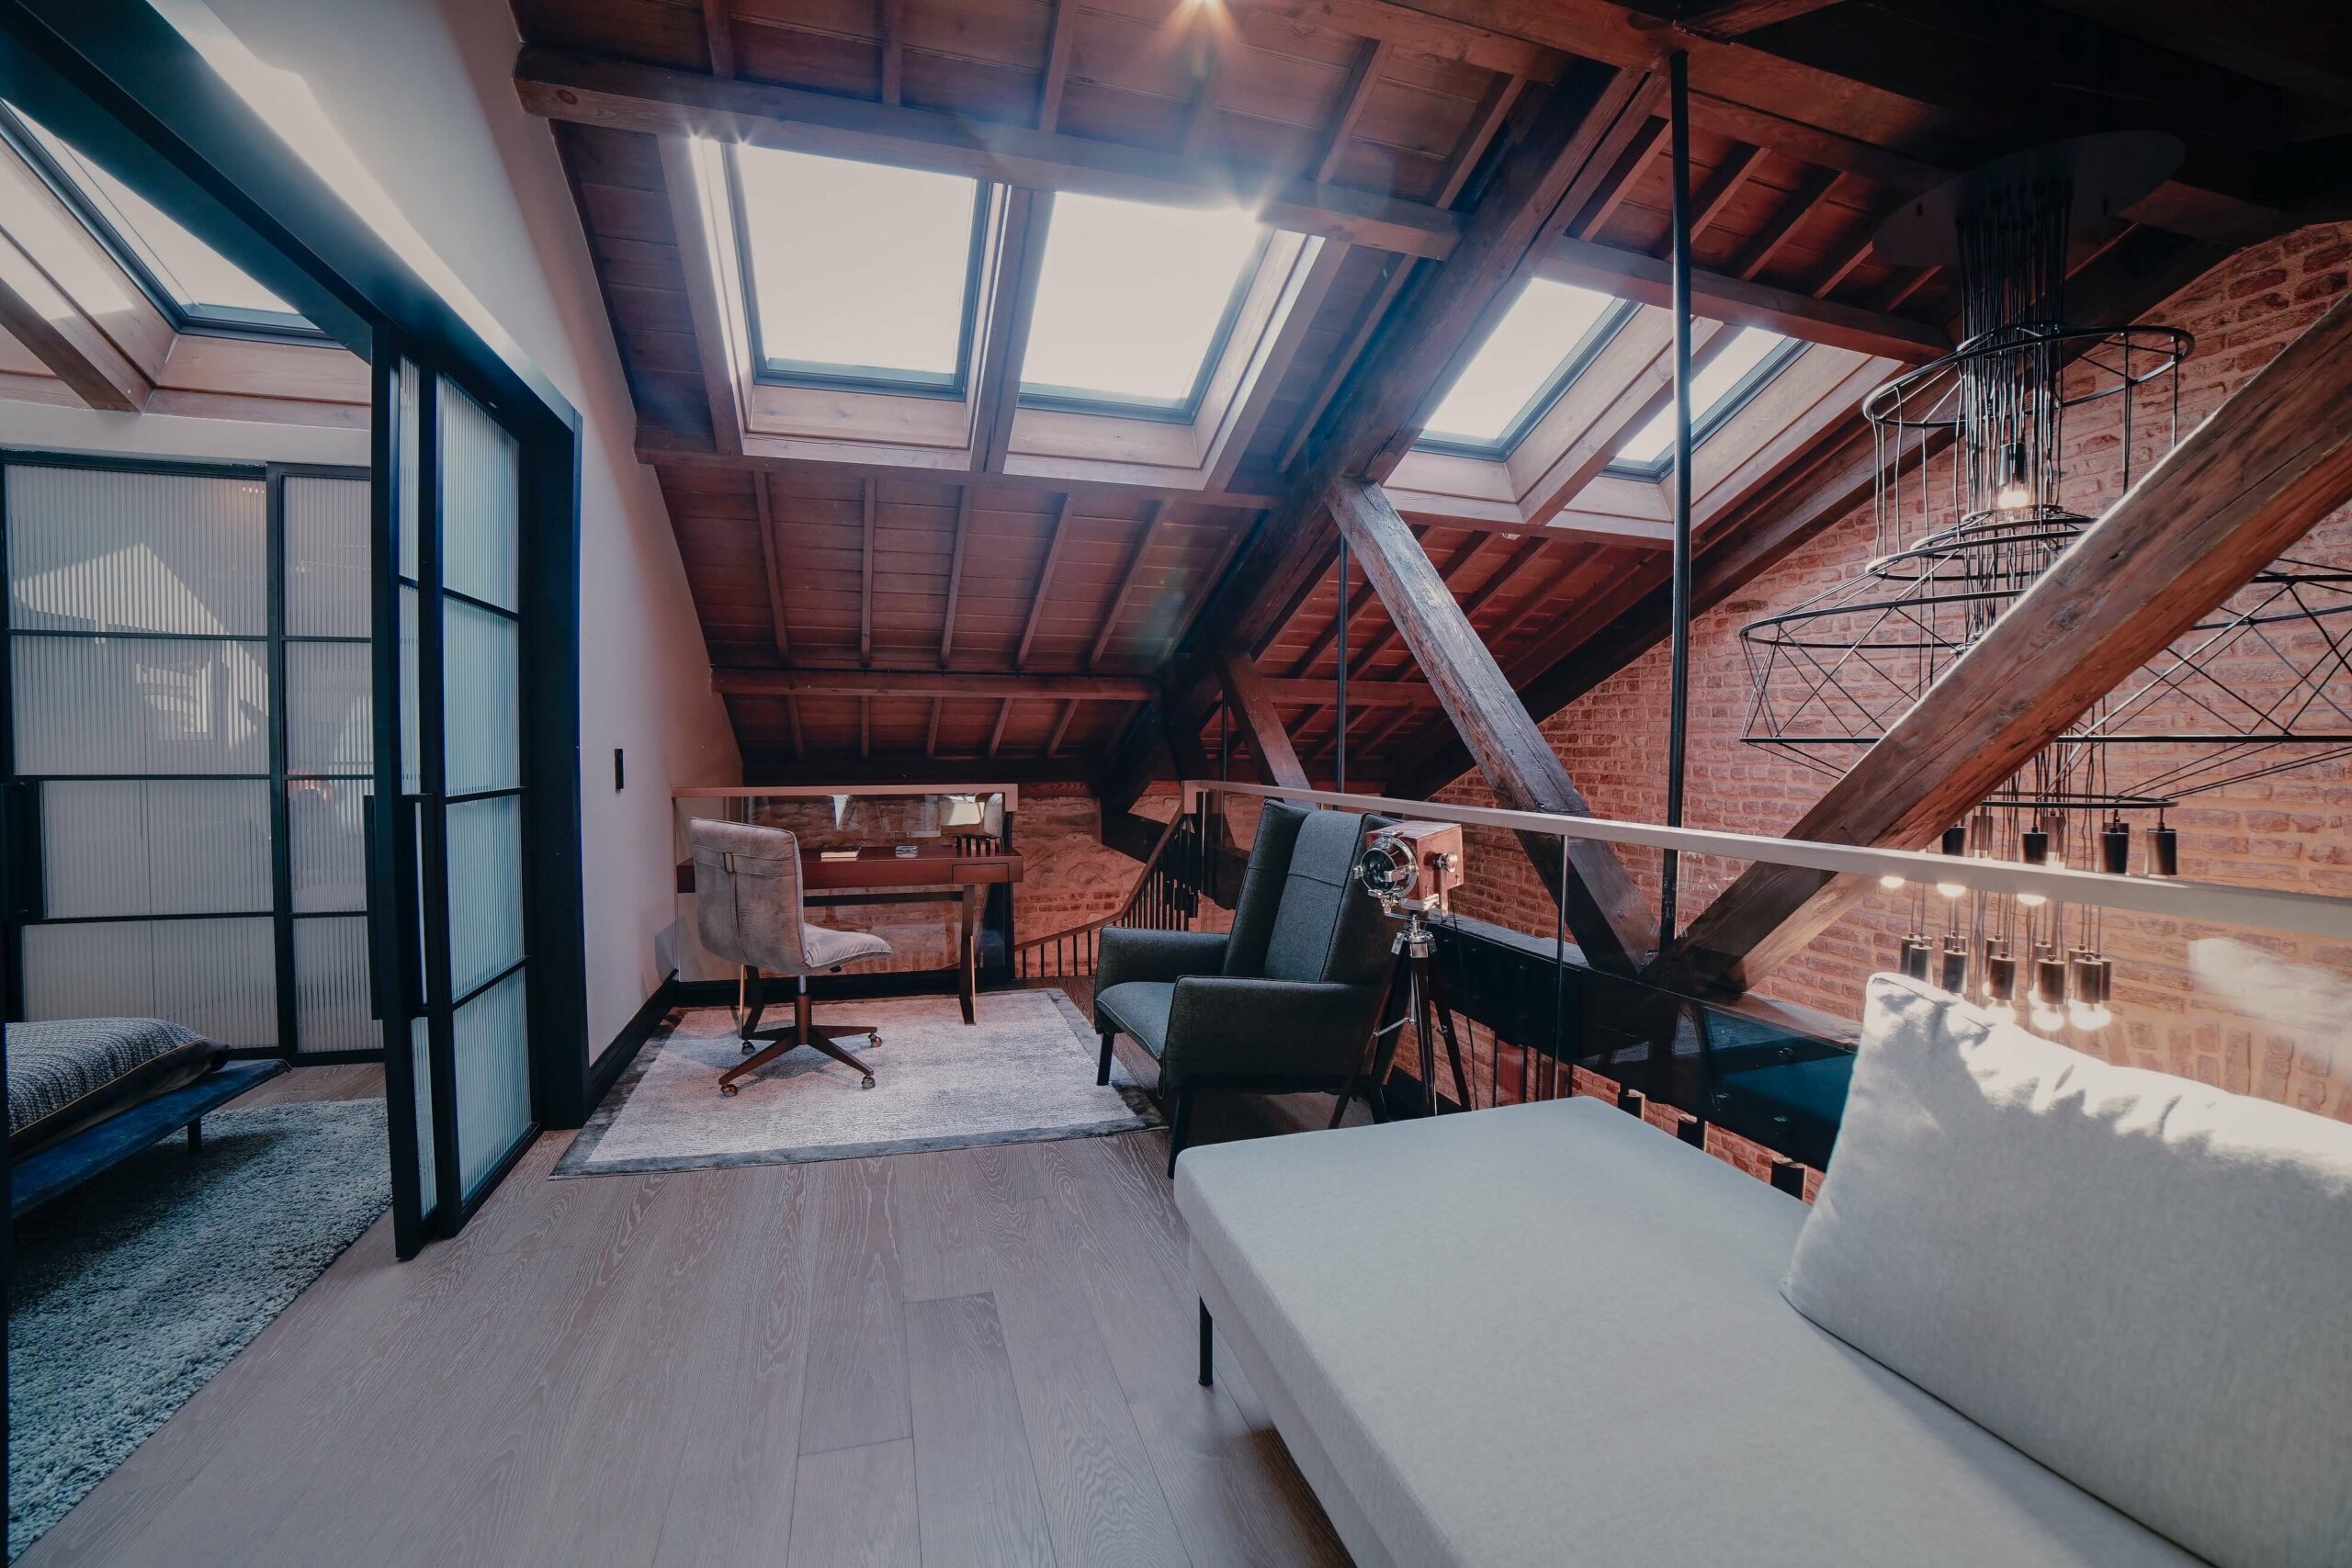
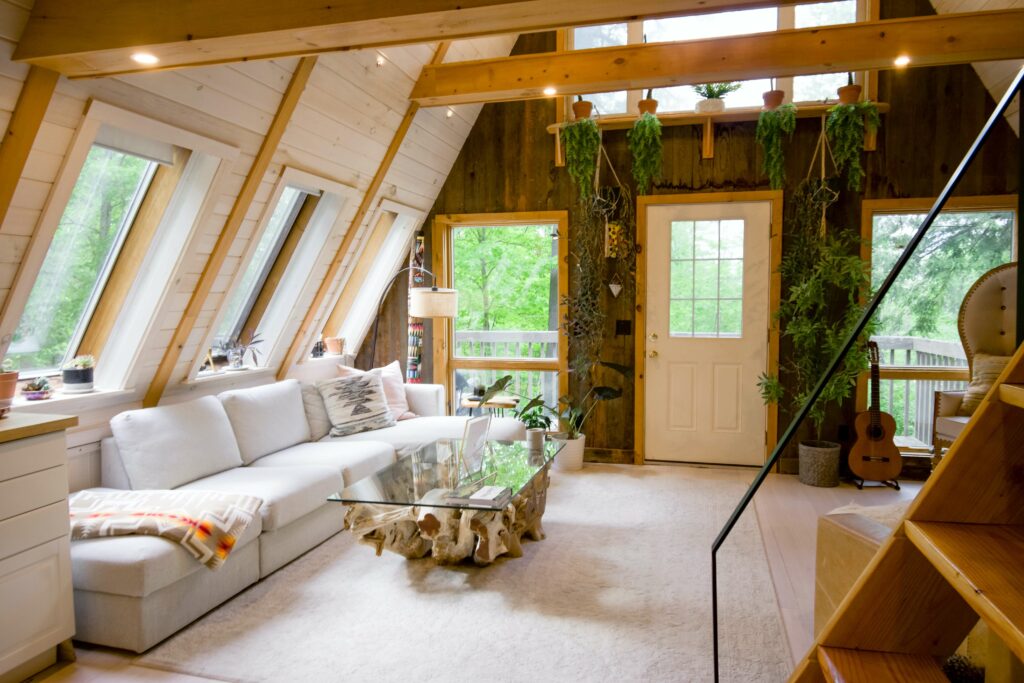
Phase 2 : Installation des fenêtres de toit et apport de lumière
Les fenêtres de toit transforment radicalement vos combles aménageables. La lumière naturelle rend l’espace immédiatement plus accueillant. Le choix des ouvertures mérite une réflexion approfondie.
Plusieurs types de fenêtres existent pour les toitures inclinées. Les modèles à rotation s’ouvrent par le haut. Les versions à projection offrent une vue panoramique très appréciable.
L’orientation des fenêtres influence l’ambiance de la pièce. Une exposition sud apporte beaucoup de chaleur. Une orientation nord fournit une lumière plus douce et constante.
La taille des ouvertures dépend de la surface de la pièce. La règle recommande 1/6ème de la surface au sol en vitrage. Cette proportion garantit un éclairage naturel suffisant.
Le devis pour la rénovation de toiture inclut l’installation des fenêtres. Cette étape requiert l’intervention de professionnels qualifiés. L’étanchéité autour des ouvertures exige une attention particulière.
Phase 3 : Aménagement de l’espace intérieur et cloisonnement
Le cloisonnement organise intelligemment l’espace sous les combles. Les cloisons légères s’adaptent parfaitement aux contraintes de la charpente. Elles définissent les différentes zones fonctionnelles.
Les plaques de plâtre constituent le matériau idéal pour ce type d’aménagement. Leur légèreté préserve la structure existante. Leur mise en œuvre rapide accélère l’avancement du chantier.
Les rangements sur mesure exploitent les zones de faible hauteur. Les espaces sous pente accueillent placards et tiroirs. Cette optimisation maximise la surface utile.
La configuration doit tenir compte des contraintes techniques. L’emplacement des conduits et gaines influence le plan. Les points d’eau déterminent la position des pièces humides.
Phase 4 : Installation des réseaux (électricité, eau, chauffage)
L’installation électrique nécessite une planification minutieuse. Le positionnement des prises doit anticiper vos besoins futurs. Un circuit dédié garantit la sécurité de votre installation.
L’arrivée d’eau permet d’installer une salle de bain dans les combles. Les raccordements doivent respecter certaines normes techniques. La pression disponible influence le choix des équipements sanitaires.
Le chauffage mérite une attention particulière dans cet espace. Les combles subissent davantage les variations de température. Un système adapté garantit une pièce chauffée uniformément.
Plusieurs solutions de chauffage s’offrent à vous. Les radiateurs électriques présentent un coût d’installation modéré. Le chauffage central assure une température homogène dans toute la maison.
Pour une salle de bains fonctionnelle, demandez un devis de rénovation de salle de bain détaillé. Ce document précise tous les aspects techniques nécessaires. Il garantit une installation conforme aux normes en vigueur.
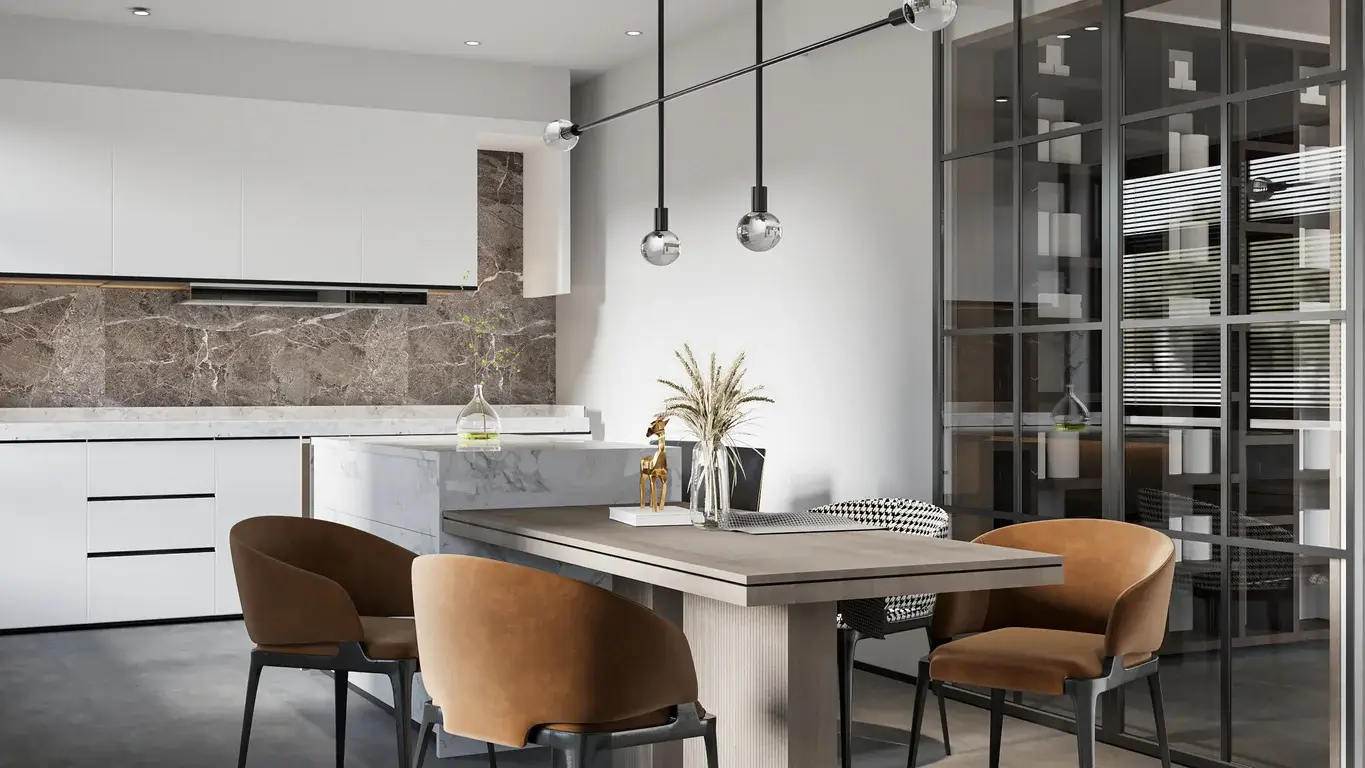
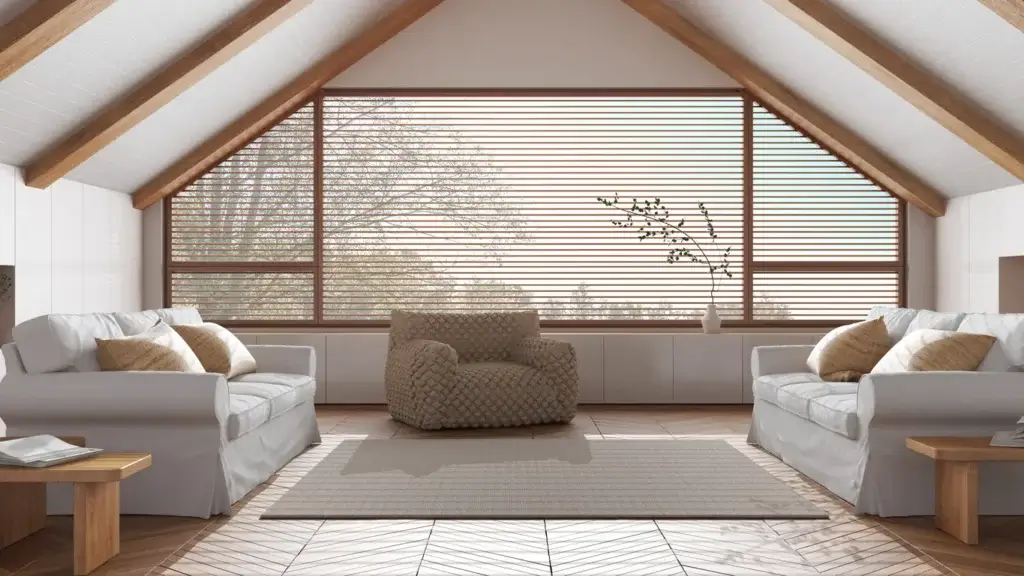
Phase 5 : Finitions et décoration
Les finitions déterminent l’aspect final de vos combles aménagés. Le choix des revêtements influence l’ambiance générale. Les matériaux clairs agrandissent visuellement l’espace.
Le sol doit allier esthétique et résistance. Le parquet apporte une chaleur naturelle très appréciée. Le stratifié offre un excellent rapport qualité-prix.
Les murs nécessitent des finitions adaptées aux particularités des combles. La peinture éclaircit et agrandit visuellement la pièce. Le lambris crée une atmosphère chaleureuse et cosy.
Le mobilier s’adapte aux contraintes de l’espace sous pente. Les meubles bas trouvent leur place sous les parties les moins hautes. Les solutions sur mesure exploitent chaque recoin disponible.
L’éclairage joue un rôle essentiel dans cet aménagement spécifique. Les spots encastrés conviennent parfaitement aux plafonds rampants. Les lampes d’appoint compensent le manque de lumière naturelle.
Un exemple de devis de décoration intérieure illustre ces différentes possibilités. Ce document précise les matériaux et finitions envisagés. Il chiffre précisément chaque poste de dépense.
Aménager ses combles pas à pas avec Reno !
En conclusion, l’aménagement des combles se profile comme une démarche à la fois enrichissante et complexe. Vous avez donc tout intérêt à disposer d’un accompagnement professionnel. La hauteur plafond et les travaux aménagement peuvent être considérés comme des défis. Mais ils deviennent des opportunités sous l’égide de nos spécialistes.
En effet, transformer des combles aménageables en espaces de vie fonctionnels nécessite de bien comprendre les normes d’isolation et les règlements liés à la déclaration préalable. Aussi requiert-elle une vision artistique pour maximiser la surface habitable tout en préservant l’esthétique.
En somme, choisir l’accompagnement d’une agence d’architecture dans le domaine de l’aménagement des combles représente la clef d’une expérience réussie. N’hésitez donc pas à nous contacter dès maintenant pour parler de votre projet et obtenir un devis !
FAQ : Vos questions sur l’aménagement de combles
Combien coûte en moyenne l’aménagement de combles au m² ?
Le prix de rénovation au m² d’une maison varie selon plusieurs facteurs importants. La complexité technique influence directement le coût final. Les finitions choisies modifient également le budget nécessaire.
Un aménagement de combles simple coûte environ 1000€/m². Cette estimation inclut l’isolation et les cloisons basiques. Elle comprend également les revêtements de sol et muraux standards.
Les projets plus élaborés atteignent facilement 2000€/m². Cette fourchette correspond à des prestations haut de gamme. Elle inclut des matériaux premium et des équipements sophistiqués.
La création d’une salle d’eau augmente significativement le budget. Les travaux de plomberie représentent un poste important. L’étanchéité et la ventilation génèrent des coûts supplémentaires.
Pour un exemple de devis de rénovation d’appartement ou de combles, contactez notre équipe. Ce document détaillera précisément chaque intervention. Il vous permettra d’anticiper votre budget global.
Faut-il toujours une déclaration préalable pour aménager ses combles ?
La déclaration préalable de travaux s’avère généralement nécessaire. Ce document administratif informe la mairie de votre projet. Il permet de vérifier sa conformité avec les règles d’urbanisme.
Certains cas particuliers échappent à cette obligation. Les travaux intérieurs sans modification de l’aspect extérieur peuvent être exemptés. Cette situation reste cependant assez rare.
L’ajout de fenêtres de toit nécessite systématiquement une déclaration. Ces ouvertures modifient l’aspect extérieur du bâtiment. Leur installation doit respecter les règles locales d’urbanisme.
La création de surface habitable impacte également la fiscalité. La taxe foncière augmente proportionnellement à la nouvelle surface. Ces aspects méritent d’être anticipés dans votre budget global.
Une déclaration incorrecte entraîne des risques importants. Les infractions peuvent générer des amendes conséquentes. La régularisation s’avère souvent complexe et coûteuse.
Comment maximiser la lumière naturelle dans un espace sous combles ?
Les fenêtres de toit constituent la solution principale pour l’éclairage naturel. Leur nombre et leur taille déterminent la luminosité de l’espace. Leur positionnement influence également la qualité de la lumière.
Les modèles à projection offrent une vue panoramique appréciable. Ils créent une sensation d’espace supplémentaire. Ces ouvertures apportent davantage de lumière qu’un modèle standard.
Les puits de lumière conviennent aux combles éloignés du toit. Ces dispositifs canalisent la lumière vers l’intérieur. Ils illuminent efficacement les zones sombres de la pièce.
Les couleurs claires amplifient la luminosité naturelle disponible. Les murs blancs réfléchissent efficacement la lumière. Les surfaces brillantes contribuent également à cette diffusion lumineuse.
Les miroirs stratégiquement placés multiplient les sources lumineuses. Ils créent une impression d’espace supplémentaire. Cette astuce transforme radicalement une pièce sombre.
Un devis de rénovation de cuisine sous combles intègre ces aspects essentiels. L’éclairage influence directement le confort d’utilisation. Notre expertise garantit un espace fonctionnel et agréable.

")
")
")